

| The screenshots below are taken from EagleEyes for iPhone. There might be a few slight differences among the versions for iPhone, iPad, Android phones, and Android tablets, but the operations are basically the same. | |||||||
| Interface Overview | |||||||
| Operation | |||||||
|
![]()


![]()
Operation
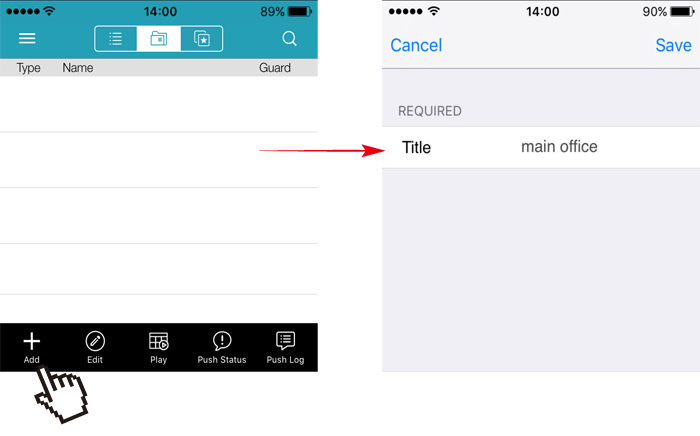
Device Management – Add a device
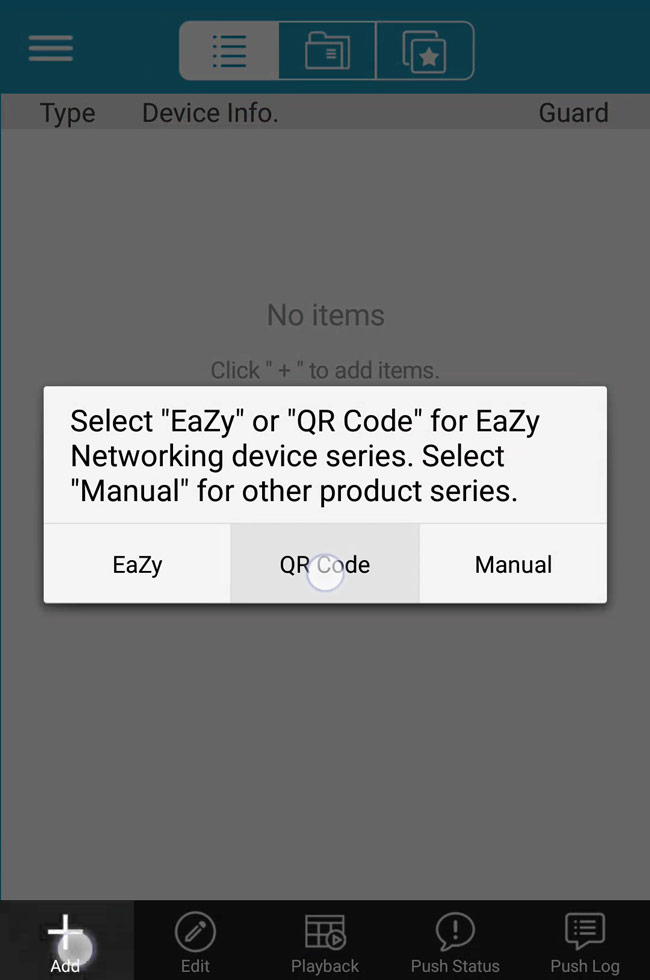
Tap + to add a new device and you’ll see three options: EaZy, QR Code and Manual. EaZy and QR Code are the options for the AVTECH products which support EaZy Networking. EaZy is used for both recorders and IP cameras while QR Code is used only for recorders. EaZy Networking is a free P2P cloud service to connect AVTECH devices to the Internet automatically by plug-and-play, enabling you to check the live view via your mobile device or laptop at anytime. When a device is configured to the internet via EaZy, the person who configures the device has the administrator permission of this device and also has the power to assign who can access the device remotely, by the web browser of Internet Explorer or the mobile app of EagleEyes. When a device is configured to the internet via QR Code, everyone has the right to access the device as long as he/she is able to scan the QR code of the device. However, he/she can only access the device via the mobile app of EagleEyes. Internet Explorer is not supported. Please check the product specifications or check with your installer to know if your device supports EaZy Networking. Otherwise, please select Manual. |
![]()
| By EaZy |
Tap Add to add a new device. Then, tap EaZy if the device is configurable with EaZy Networking and you need the administration power for remote access. |
||||||||
|
||||||||
| The supported device series are shown below: | |
| ① | IP Camera |
| ② | Wireless IP Camera |
| ③ | DVR / NVR |
| Select the device type you have, and follow the onscreen instructions to complete the network setup. | |
▉ Icon Indication for Device Type ![]()
![]()
| By QR Code |
Tap Add to add a new recorder. Then, tap QR Code if the recorder is configurable with EaZy Networking and you do not need any administration power for remote access. |
 |
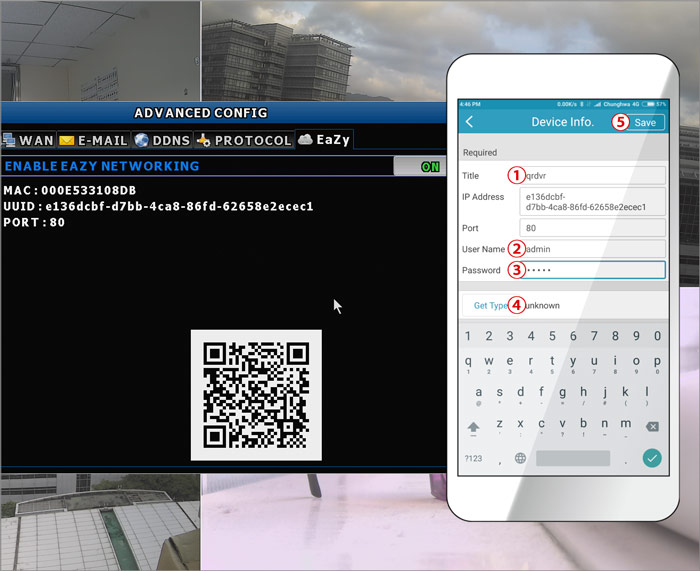
Scan the QR code shown on your recorder, and enter the title of this device and its user name and password. Make sure you see the device type when you tap Get Type. If not, the device is not connected properly. Then, Tap Apply to complete the process. |
| Note: | For the first time to connect your device to the internet, the default user name and password are both admin. If it’s been configured before, make sure you’ve known its current user name and password since they may be changed for security purpose. |
 |
![]()
| By Manual |
| Note: | Please configure your device to the Internet first, and you have the access information in hand, i.e. IP address, port number, user name and password. |
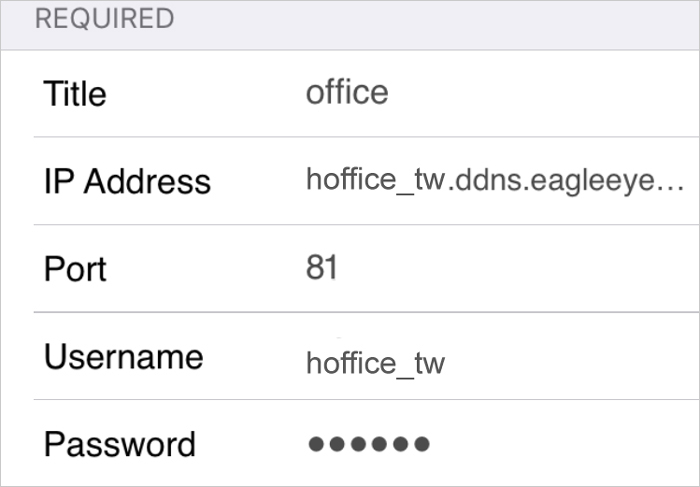
In the section of REQUIRED, fill in the information needed to access your device (IP Address / Port / Username / Password), and name your device in Title. |
![]()
Select Get Type to examine whether the information filled in is correct. |

![]()
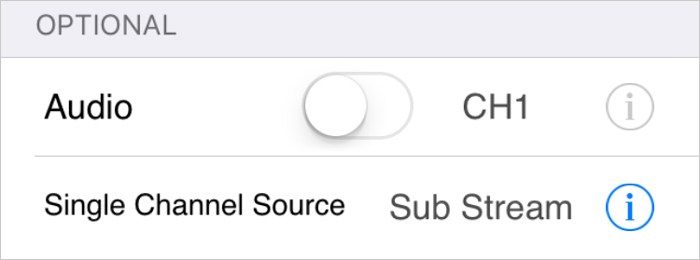
If the information is correct, you’ll see the correct device type, and options suitable for this device will display in the section of OPTIONAL. |
![]()
| Tap Save on the top right corner to save the return to the main page. |

![]()
| Options available may vary based on the device you connected: | |
Audio |
Turn the audio on or off |
Quality |
Choose the image quality you want: BEST / HIGH / NORMAL / BASIC. |
Channel Title |
Switch to display each channel title or not. |
Resolution |
Choose the video resolution you want: Small / Large. |
| Stream | Choose the profile you configure in the IP camera you want. |
| Stream Type | Choose the video type you want: main stream / sub stream / recording stream. |
| Single Channel Source | Choose the video source when a single channel is selected: Sub Stream / Recording Stream. |
![]()
Local Network Search is used to search the IP address of your device assigned by your router in the same local network and add it to the address book. However, the access is available only in the LAN environment, meaning you’re unable to access the device when you leave the area. To be able to access your device from anywhere, please configure it to the Internet. For more details, please check:
|
![]()
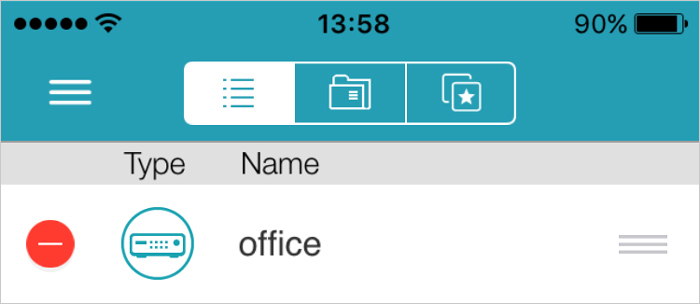
Device Management – Edit / Remove a device
Tap Edit to modify a device: |
|
| 1. | To remove a device, tap |
| 2. | To edit a device, tap the device you want to enter the edit page. |
| 3. | To change the order of each device, tap and hold |
![]()
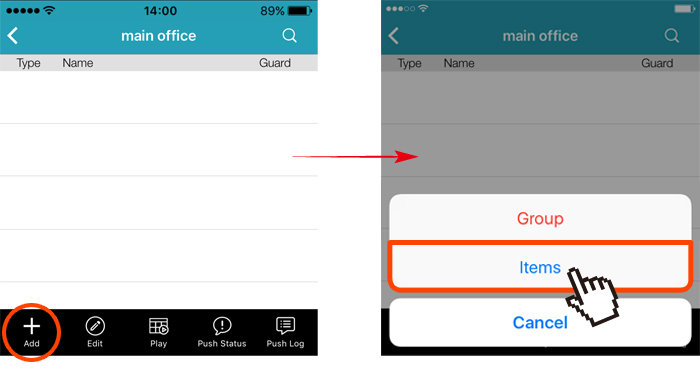
Device Management – Group
Note: This function is not available for EagleEyes Lite. Tap |
|
| ▉ | Add a group folder |
| Tap Add and select Group. Key in the title of the new folder, and tap Save to return to the group page. | |
|
|
| ▉ | Add a device to a group folder |
| 1. | Select the group folder you just created, and tap Add. |
| 2. | Choose Items to list all the current devices in the address book, and check the device(s) you’d like to add to the current folder. |
| 3. | When all the devices are selected, choose Add again to add and return to the group page. |
![]()
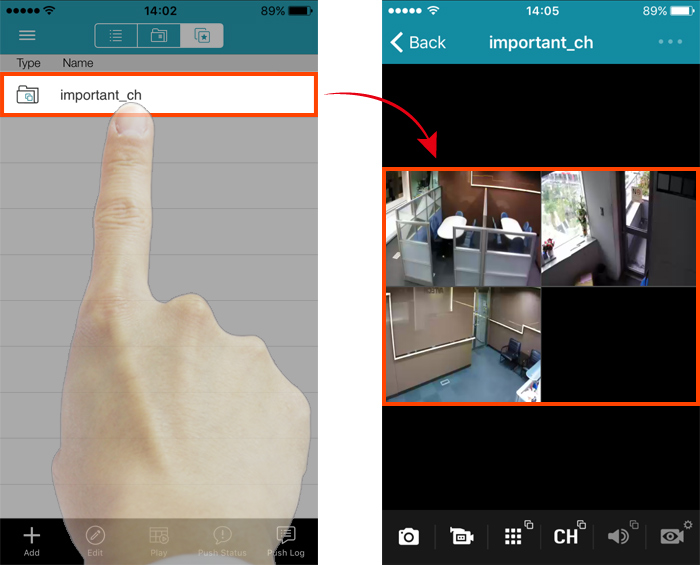
Device Management – My Favorites
Note: The EagleEyes versions for iPad and Android tablets do not support this function. |
|
Tap This function allows users to specify a specific channel of a device to a group folder. up to 16 channels in a folder. When the folder is added and selected, users are able to see the channels specified in the folder in one view. Tap Add to create a folder and add the channels you want: |
|
| 1. | In REQUIRED, key in the title of the folder, and switch Channel Title on if you want to see the titles of the channels you’ve added. |
| 2. | In Items, tap + to select a device from your current device list, and select the channel you want. |
| Note: You might see the preview of each channel depending on the model you have. | |
| 3. | Repeat Step2 till you’ve added all the channels you want to see (up to 16 channels), and tap Save to create the folder within which includes the channels you just selected. |
| 4. | Directly tap the folder to see the live view of selected channels. |
![]()
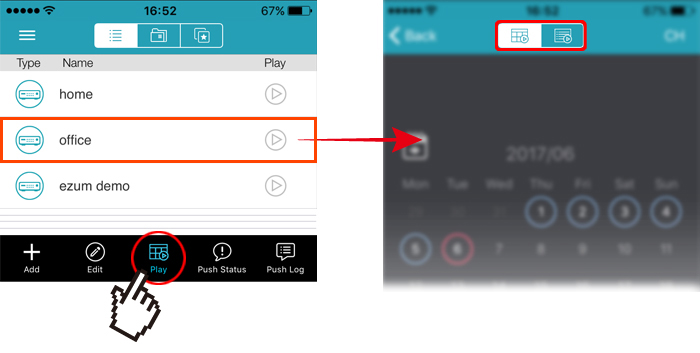
Video Search & Backup
Choose Play and select a device from the list to enter the video search page by Calendar or Event.
| ① | ② |
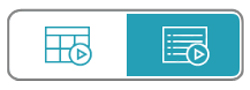 |
| ① | Search by Calendar |
| ② | Search & Backup by Event |
![]()
| Search by Calendar |
| 1. | Select when you have footages recorded on the calendar view, and slide the time bar to search the time you want. |
| 2. | To select the channel you want to see, tap CH, and choose a single channel |
| Note: You might see the preview of each channel depending on the model you have. | |
| 3. | Tap Calendar to return to the calendar view, and tap |
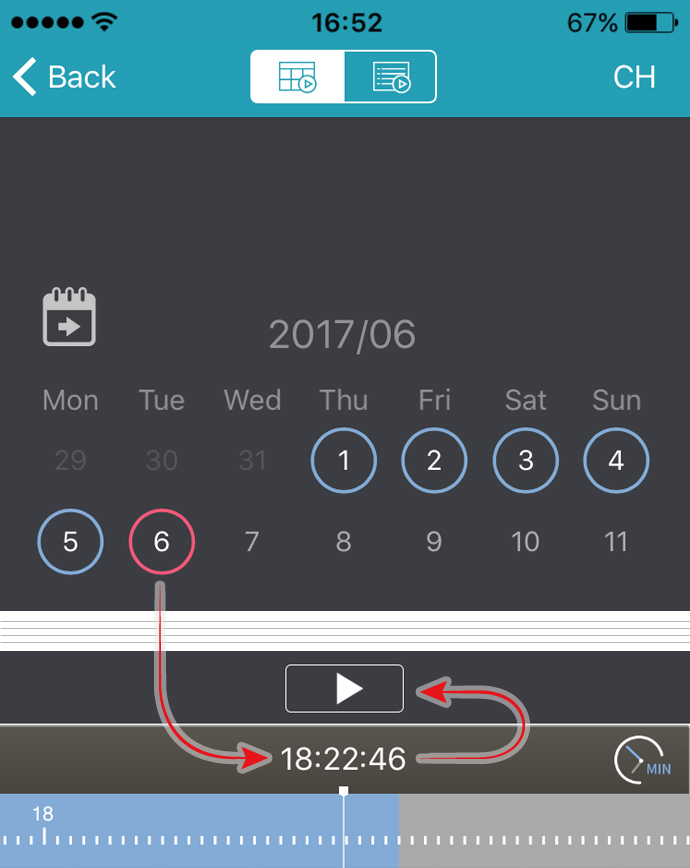 |
|
Note: When you select a single channel to see, you'll be able to edit the footage |
|
![]()
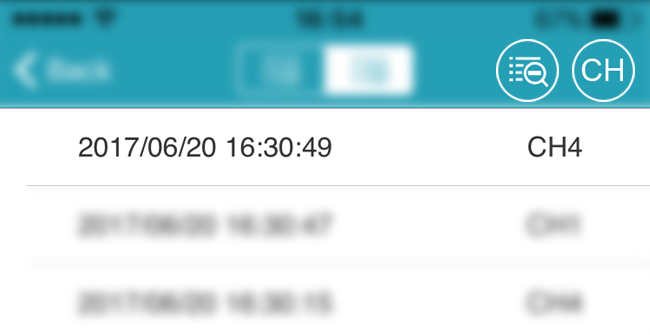
| Search & Backup by Event |
| 1. | Select the event list: ER / MR / MT |
|||||||||||||||

|
||||||||||||||||
| 2. | To narrow down the list, select |
|||||||||||||||
| 3. | Select one log from the list to directly go to the playback view. | |||||||||||||||
 |
||||||||||||||||
| 4. | In the playback view, wait till the playback is over, and tap |
|||||||||||||||
| 5. | Slide the time bar to specify the footage segment you want, and tap
|
|||||||||||||||
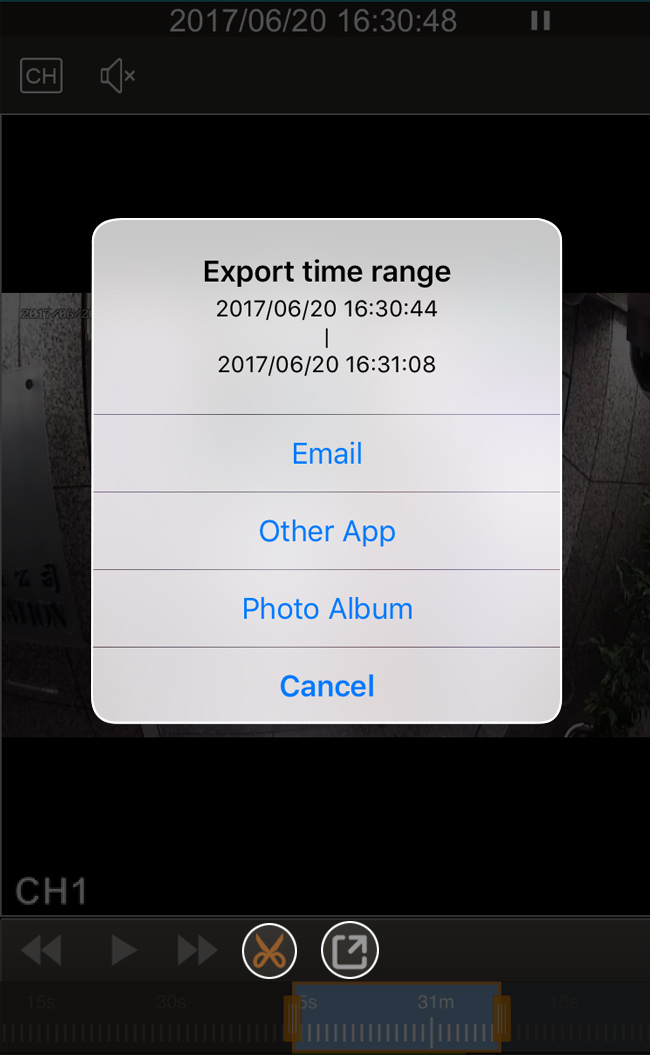 |
![]()
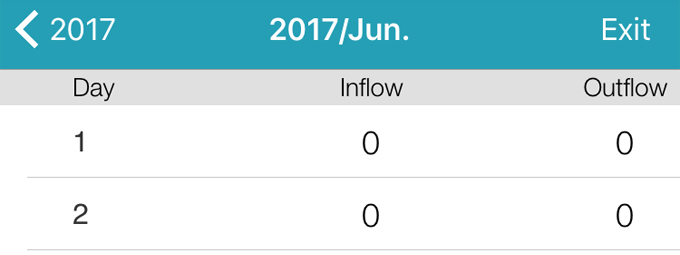
IVS - Flow Counting Statistics
Note: This function is available only for devices which support IVS features. |
|||||||||||
In the live view, choose |
|||||||||||
Note: For iPhone and Android phones, you’ll need to choose “...” on the top right corner to see |
|||||||||||
| For iPhone and Android phones, when your device is held vertically (portrait), you’ll see statistics; when your device is held horizontally (landscape), you’ll see bar graphics. | |||||||||||
For iPad and Android tablets, please switch between |
|||||||||||
 |
|||||||||||
 |
|||||||||||
|
|||||||||||

![]()
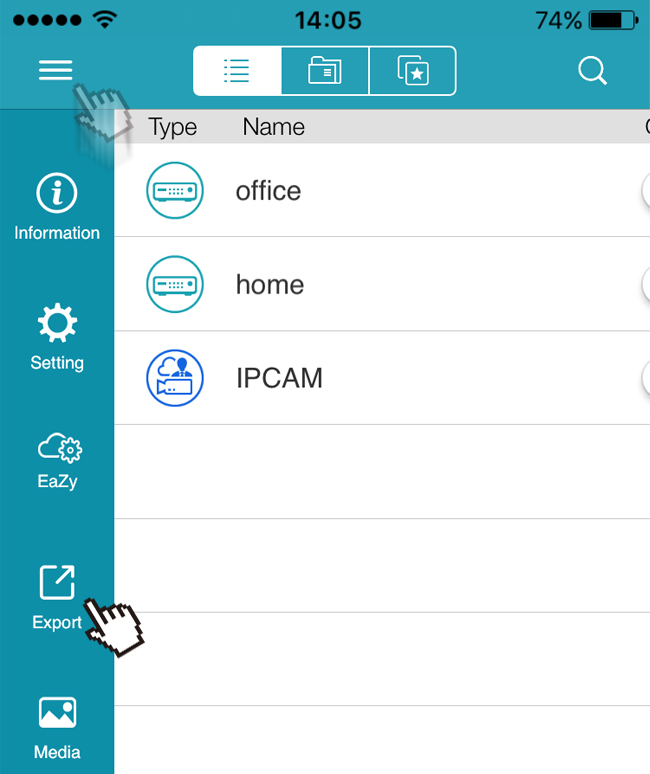
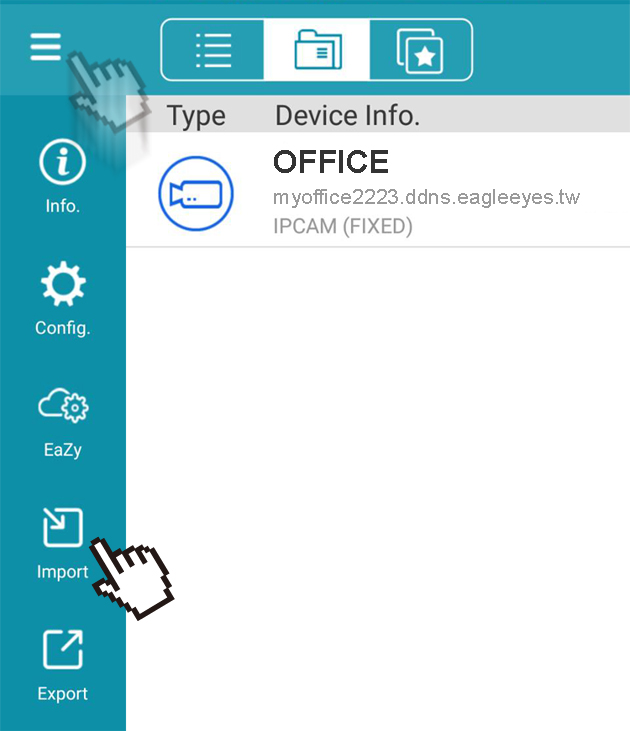
Device List Export / Import
| This function is used to export the device details saved in EagleEyes for backup, or you can import the information to another mobile device without configuring every device in EagleEyes. The exported file could be sent by Email or other APP which supports this function, for example, Google Drive. The exported file is in XML format. |
![]()
| File Export |
| 1. | Tap |
|
|
| 2. | Select the device(s) for which you want export the details, and choose Export to continue. |
| 3. | Rename the file of the exported file if needed, and choose Export. |
|
|
| 4. | Choose how to send the file: by Email or Other APP. |
![]()
| File Import |
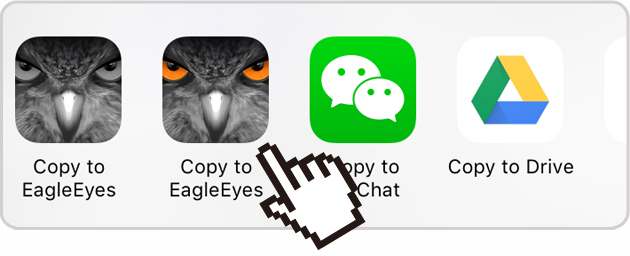
For iOS devices |
|
| 1. | Go to where you saved the xml file, and tap the file to open it. |
| - | When Email is chosen, tap the attached xml file to open it, and tap |
| - | When Other APP is chosen, such as Google Drive, tap the xml file and choose EagleEyes to open it. |
|
|
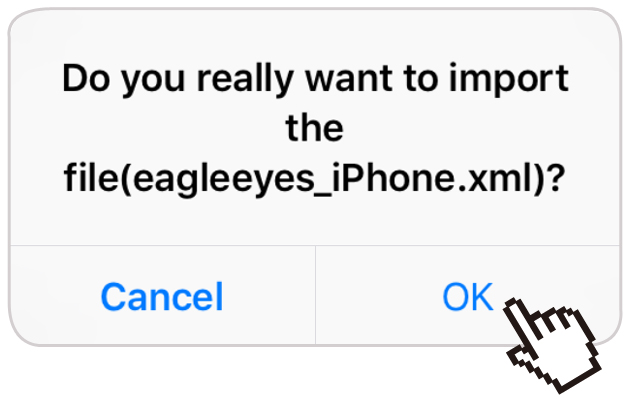
| 2. | You’ll be prompted to import the device list file. Select OK to import. |
|
|
For Android devices |
|
| 1. | Tap |
|
|
| 2. | Browse to where you saved the exported xml file (in your mobile phone or tablet, or on the cloud service), and choose the file to import the device list. |
Note: If the xml file is saved on Google Drive, please move it to other cloud services, such as Dropbox, or directly saved it to your mobile phone or tablet because file import from Google Drive is not supported. |
|
![]()
EaZy Cloud Service
| EaZy is a cloud service provided by AVTECH to manage devices which support EaZy Networking and configure its access right with other cloud account(s). With an EaZy cloud account, users are able to: | |
| - | Configure AVTECH devices to Internet simply within a few steps when the devices support EaZy Networking. |
Note: To know details about network configurations, please refer to the user manual of your device. |
|
| - | Share the access right of your cloud device with other EaZy cloud account(s) (Buddy). |
| - | Speed up video transmission if needed by purchasing our data plan. |
![]()
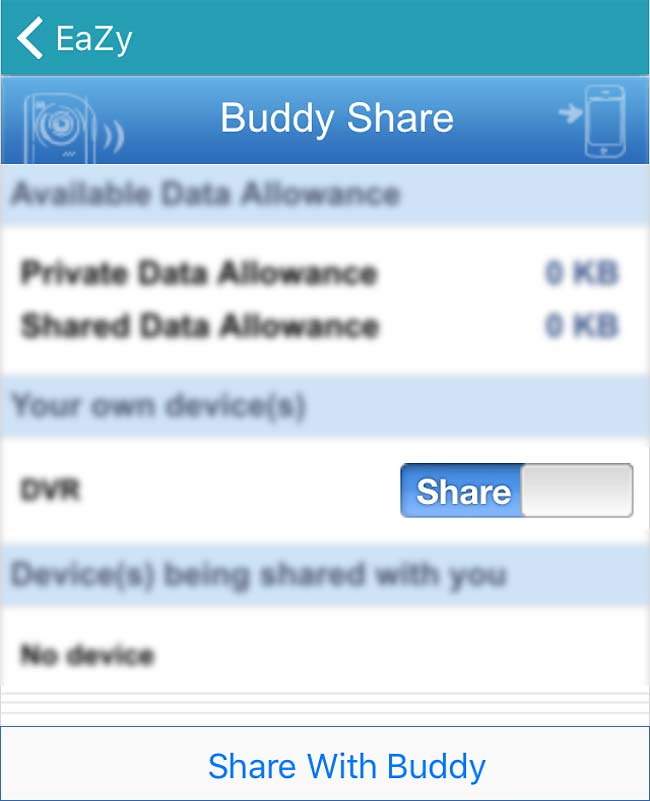
| Buddy |
| This function is used to share the access right of your cloud device with other account(s). The account being shared with will automatically display your cloud device when it’s been logged into the EaZy cloud service. | |
| Note: One cloud device could be shared up to 30 cloud accounts, but the access to the device might be failed because it is still restricted to the maximum online user setup of the device. | |
| 1. | Tap |
| 2. | Select Buddy to enter the Buddy Share list. You’ll see the devices you can share with other account(s), and the devices you’re shared with. |
|
|
| 3. | Tap Share With Buddy, and select a device you want to share. Then, choose Next. |
| 4. | Enter the account you want to share with, and choose Add to check if the account information is correct. Choose Add to add another account, or Next to the next step. |
| 5. | Configure the access right of the account to your device, and select Next. |
| 6. | Check if the information is correct, and select Share! to finish the process. |
![]()
| Speed Up Video Transmission |
| In most cases, the device is connected via P2P. Connection via the relay server is only applied to some complex environments such as the private IP-based network environment used by a large enterprise. |
|
| There is no speed limitation of P2P connection. For connection via the relay server, the speed is up to 10FPS@512kbps. To obtain stable transmission, it's recommended to purchase our data plan of 1GB or 7GB. (Each device will enclose a 2GB data plan for a free trial.) |
|
| Tap |
|
| - | USD 1 / 1GB, approx. 520 minutes |
| - | USD 5 / 7GB, approx. 3640 minutes |
 |
|
| The usage time per plan is for reference only, and may vary based on the complexity of your actual monitoring area. | |
![]()
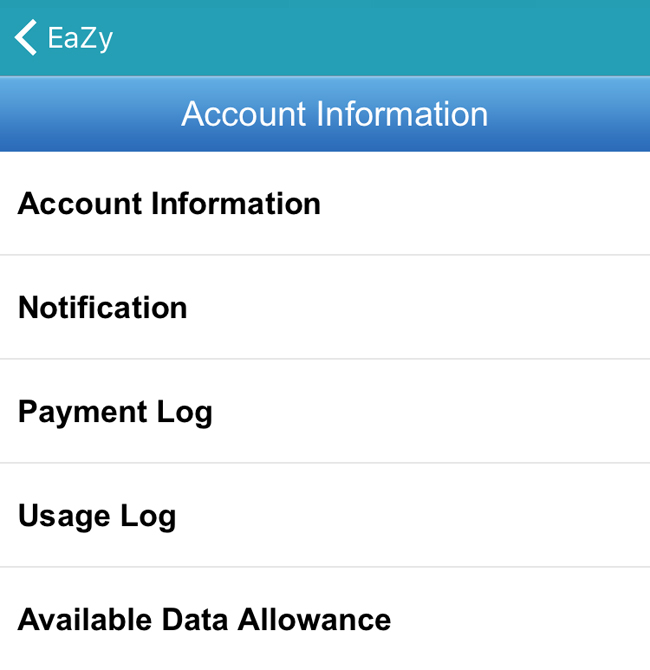
| Check Account Information |
| 1. | Tap |
| 2. | Select Details to check account information, including your purchase record and the usage record of data allowances. |
 |
![]()
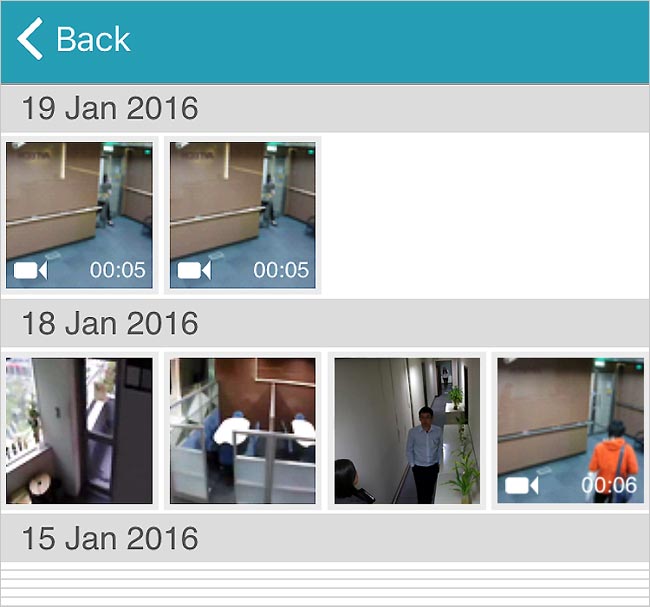
Media
| This folder is used to save snapshots taken by |
| Note: To know how to edit a footage, please refer to “Search & Backup by Event”. |
| Tap |
 |
![]()
APP Setting
| LIVE STREAMING |
| Auto Login | Turn on Auto Login, and you will be automatically logged in to the device you last used every time you open EagleEyes. |
| RTSP Protocol | Tap to choose the desired protocol: Auto / HTTP / TCP |
| Gesture Command | Turn on Gesture Command to interact with EagleEyes using your fingers on the touch screen. |
| PTZ Turbo | PTZ Turbo commands the movement speed of cameras. On a scale of 1 to 5, 1 is slowest and 5 fastest. |
| Latency | Lowest Latency / Low Latency / Default / Fluency / Better Fluency |
| Sequence Time | Sequence Time determines the time gap of each channel switching: 3 Seconds / 5 Seconds / 10 Seconds / 15 Seconds |
| Cache Size | Cache Size determines the buffering time of playback: 128KB / 256KB / 512KB / 1MB |
| Record Duration | Set how long the record should be last: 10 Seconds / 30 Seconds / 1 Minute / 3 Minutes |
![]()
| PUSH VIDEO |
| Alert Sound | Turn on Alert Sound, and your device will sound an alert when any push messages received. |
| Sound Tones | Choose your desired tones while receiving push notification |
| Sound Duration | Choose the duration of alert sound: 1 Seconds / 3 Seconds / 10 Seconds |
![]()
| SYSTEM |
| Auto Lock | When Auto Lock is on, iPhone locks if you don’t touch the screen for a minute or so. |
![]()